Hey there, if you’ve got existing plug valves sitting in your industrial setup that feel like they’re losing their spark—maybe they’re leaking when they shouldn’t, sticking when you turn the handle, or just not keeping up with your operation’s changing needs—you’re probably wondering if a full replacement is the only move. Spoiler: It’s not. As a plug valve supplier who’s worked with hundreds of plant managers, maintenance techs, and process engineers over the last decade, I’m here to walk you through how to upgrade an existing plug valve, step by step, without breaking the bank or halting production for weeks. Let’s cut the jargon and get real. Plug Valve
First off, let’s get one thing straight: Upgrading a plug valve isn’t the same as swapping it out for a brand-new one. A lot of folks think, “Eh, might as well replace it,” but that’s often a waste. The existing valve is already matched to your pipe size, bolt pattern, and footprint—pulling it means reworking gaskets, adjusting piping, maybe even shutting down an entire line, which costs way more than the valve itself. Upgrading, though, works with what you’ve got to fix pain points, boost performance, and extend its life. I’ve seen valves that were 20+ years old get upgraded and run like they’re fresh off the shelf for half the cost of replacement. So why wouldn’t you at least consider it?
Let’s start with figuring out if your valve is even upgrade-worthy. Not every old plug valve is a candidate—if the body’s cracked, the stem’s bent, or the seat recess is corroded beyond repair, replacement might be the call. But if it’s just underperforming? Total upgrade material. The first step here is a quick, low-stakes inspection before you do anything else. I tell all my customers to grab a flashlight, a socket set, and a notebook, then: Turn the valve to the closed position, mark it so you can tell where it’s supposed to sit, then open and close it slowly a few times. Feel for grit, hear for grinding or sticking, check for leaks around the packing gland (that’s the area where the stem meets the body) and the flanges. Also, note what industry you’re in—oil and gas, water treatment, chemical processing? That matters for what kind of upgrade makes sense. If it’s leaking chemical and the packing’s failing, that’s a clear upgrade need, not a full swap.
Now, let’s get into the actual upgrade steps, and I’ll throw in real-world examples from jobs I’ve handled to make this concrete. Let’s break this down into three core upgrade types, because most people only need one or two—no need to overhaul the whole thing unless you have to.
First, the low-hanging fruit: Packing and Seat Upgrades. This is the most common upgrade I recommend, because 70% of the plug valve issues I see trace back to bad packing or worn seats. Let’s start with packing. The standard graphite or PTFE packing that comes on most valves eventually breaks down—especially if you’re working with extreme temps (hot oil, super cold water) or corrosive chemicals. Upgrading to a high-performance packing isn’t hard, and it takes like an hour for a tech who knows what they’re doing. How? First, you gotta isolate the valve—shut off the upstream and downstream valves, relieve any pressure in the line (super important, don’t skip this), then loosen the packing gland bolts and pull out the old packing. Pro tip: Don’t just yank all of it out at once—feed it out in small rings so you don’t scratch the stem. Then, install the new packing: Most high-end packing comes as split rings, so you just stagger the seams (don’t line them up straight, that’s a leak waiting to happen) and compress it with the gland bolts. For example, I had a water treatment plant client last year whose plug valves were leaking so bad they had to mop under them every shift. We upgraded their standard PTFE packing to a carbon-loaded PTFE that handles their 180°F process water, and that leak stopped cold for three years—no more mopping, no more downtime.
Next, seat upgrades. The plug valve’s seat is what seals the plug to the body—if that’s worn, you’ll get internal leakage, which kills efficiency. The stock seats that come on most valves are made of brittle cast iron or standard rubber, but upgrading to a resilient elastomer or a metal seat (depending on your application) makes a huge difference. Elastomer seats are perfect for water, food and beverage, or mild chemicals—they’re self-lubricating, so the plug turns smoother. Metal seats are for high-pressure, high-temp stuff like oil and gas, where elastomers would melt. Swapping seats is a little trickier than packing, but still doable. You have to remove the valve plug first (mark its orientation so you can put it back right—plug valves have a specific “closed” mark usually), then pry out the old seat with a seat puller (don’t use a screwdriver, you’ll scratch the body and ruin the seal), then press or bolt in the new seat. I had an oil and gas client a while back whose plug valves were so worn they’d lose 15% of their pressure when closed. We swapped their standard cast iron seats for metal-seated ones, and that pressure loss dropped to less than 1%—they saved $12k a year in energy from reduced pump load. That’s a no-brainer.
The second upgrade type: Stem and Plug Overhaul. Sometimes the plug is a little scratched or corroded, or the stem has slight wear that makes turning the valve feel sticky. That’s not a full replacement—just a polish or a recondition, plus maybe a stem upgrade. Wait, stems are upgradeable? Yep. If your current stem is stainless steel, upgrading to a coated alloy (like chrome or ceramic) makes it way more resistant to corrosion and wear, especially in abrasive environments like mining or sand processing. For the plug, if it’s got light scratches, you can send it to a machine shop to be refinished to a smooth, uniform surface—no need for a new plug. I had a mining client last year whose plug valves were in a sand slurry line, so the plug was getting pitted every six months. Instead of replacing the valve each time, we refinished the plug and upgraded the stem to a coated alloy, and now that plug lasts two years. Way cheaper than buying four new valves a year. And turning the valve? Super smooth now, no more fighting to open it on shift changes.
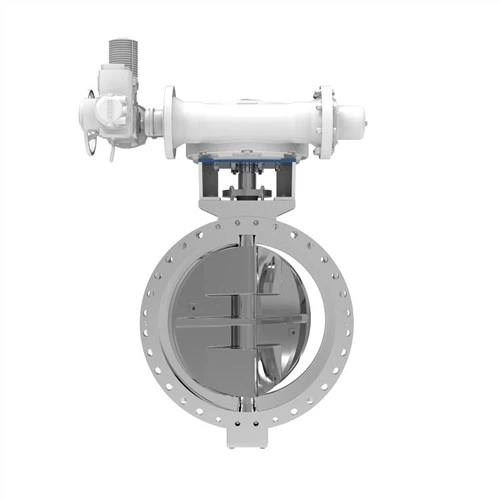
Third, and this is the big one for folks looking to future-proof: Actuation Upgrade. A lot of older plug valves are manual, with a handle that takes two hands and a little elbow grease to turn. If you’re trying to automate your process (who isn’t, these days?), upgrading from manual to electric or pneumatic actuation is a game-changer. The best part? You don’t have to replace the whole valve for this. Just mount an actuator to the existing stem. Wait, is that possible? Absolutely—modern actuators are designed to fit most standard plug valve stems, as long as you get the right size and torque rating. For example, a food processing plant I worked with had manual plug valves on their packaging lines, and each time they had to shut down a line for cleaning, it took two people 10 minutes to turn the valve. We upgraded them to electric actuators, and now it’s one person pushing a button—same job, done in 30 seconds. They cut their line changeover time by 75%, which added 2 hours of production time every single day. That’s millions in extra output a year, all from an actuation upgrade. And bonus: actuators have built-in position feedback, so you know exactly if the valve is open or closed, which is huge for safety and compliance in industries like pharmaceuticals or power generation.
Now, let’s talk about common mistakes I see people make when upgrading plug valves, because I don’t want you to mess this up. First: Not matching the upgrade to your application. I once had a customer who upgraded to a super expensive metal seat for their water line, and it was overkill—cost them twice as much as a resilient elastomer seat, and didn’t add any benefit. Do your homework, or ask your supplier (that’s me, by the way) what’s right for your process. Second: Skipping pressure relief. Always, always, relieve all line pressure before working on the valve. I’ve seen a tech get hurt because they forgot that step—valves are under pressure even when they look closed, and moving parts can fly. Third: Forgetting to mark parts. The plug’s orientation, the stem’s position, the bolt order—if you don’t mark that, you’ll waste an hour trying to put it back together right, and you might get leaks because you misaligned the plug. Fourth: Cutting corners on parts. Don’t buy cheap packing or seats from a random online seller—get OEM-grade or high-quality aftermarket parts from a trusted supplier (that’s where I come in, again) because cheap parts will fail in a few months, and you’ll end up with even more downtime.
Wait, let’s also touch on when upgrading isn’t worth it, just so we’re honest. If your valve body has a crack, if the flange bolt holes are stripped, or if the plug is so corroded it’s not smooth enough to seal even after refinishing? Replacement is better. But most of the time, if the body is in good shape, upgrading is the smarter, cheaper move. I’ve got a general rule: If 60% or more of the valve’s core structure (the body) is intact, upgrade. If not, replace. Simple as that.
Now, let’s wrap this up with a quick, actionable checklist you can use today. 1. Isolate the valve, relieve pressure, lock it out (safety first!). 2. Inspect the body, stem, and seat for damage. 3. Pick your upgrade: packing/seat overhaul, plug/stem refinish, or actuation. 4. Get the right parts from a reliable supplier. 5. Follow the step-by-step for your upgrade, double-check all seals and alignments. 6. Test the valve for leaks by closing it, pressurizing the line, and checking for drips or pressure loss.
Here’s the thing I always tell my customers: Plug valves are workhorses—they’re built to last, but like any workhorse, they need regular tune-ups instead of being replaced every few years. I’ve been in this game for 12 years, and I’ve seen countless plants waste money on full valve swaps when a $500 packing upgrade would fix their problem. The goal of upgrading is to get your valve performing better than new, without the hassle and cost of a full replacement.
If you’ve got an old plug valve that’s driving you nuts, or you’re not sure what upgrade is right for your setup, I’m here to help. We work with all industries, from small manufacturing shops to big oil and gas facilities, and we’ll tailor an upgrade plan that fits your budget and your needs. No one-size-fits-all garbage, no overcharging, just real solutions for real valve problems. Reach out to our team to chat through your specific setup, and we can walk you through every step—whether you’re a DIY maintenance tech or a plant manager who needs to keep operations running smoothly.
Floating Ball Valve Reference:
- American Water Works Association. (2020). Valve Maintenance and Upgrade Guidelines for Industrial and Municipal Systems. AWWA Press.
- Plug Valve Manufacturers Association. (2021). Performance Standards for Remanufactured and Upgraded Plug Valves. PVMA Technical Bulletin 103.
- Occupational Safety and Health Administration. (2019). Lockout/Tagout Procedures for Industrial Valve Maintenance. OSHA 3120-12R.
Zhejiang Sunawei Valve Co., Ltd.
As one of the most professional plug valve manufacturers and suppliers in China, we offer a wide range of valves with superior quality. Please feel free to wholesale high quality plug valve at competitive price from our factory. We also accept customized orders.
Address: Anfeng Industrial, Oubei Town, Wenzhou City, Zhejiang, China
E-mail: snv@sunawevalve.com
WebSite: https://www.sunay-valves.com/
